Exploring Amazon Seller Central Tips & Key Features
After perfecting your listings and going live on Amazon, you may find Seller Central overwhelming. This complex dashboard is packed with tabs, reports, and settings. Amazon Seller Central is your business’s command center, handling everything from inventory and orders to ads and customer interactions. Many sellers, however, only scratch the surface of what the dashboard offers, so we created some Amazon Seller Central tips to make it easy.
Whether you’re a newcomer or a seasoned seller, these Amazon Seller Central tips will walk you through the ins and outs of Amazon Seller Central. We’ll unlock its full capabilities to help you optimize your business, streamline operations, and boost sales.
Setting up an Amazon Seller Central account
A seller account is the beginning of your journey on one of the world’s largest online marketplaces. Here’s a step-by-step guide on how to set up an Amazon seller account.
1. Choose your selling plan
Amazon offers two selling plans, Individual and Professional. The former works if you sell fewer than 40 items per month, while the latter is best if you sell more than that each month.
Note that most serious sellers choose the Professional plan since it offers additional features and is more cost-effective for higher sales volumes (it’s also required if you want to join the Fulfillment by Amazon program).
2. Visit Amazon Seller Central
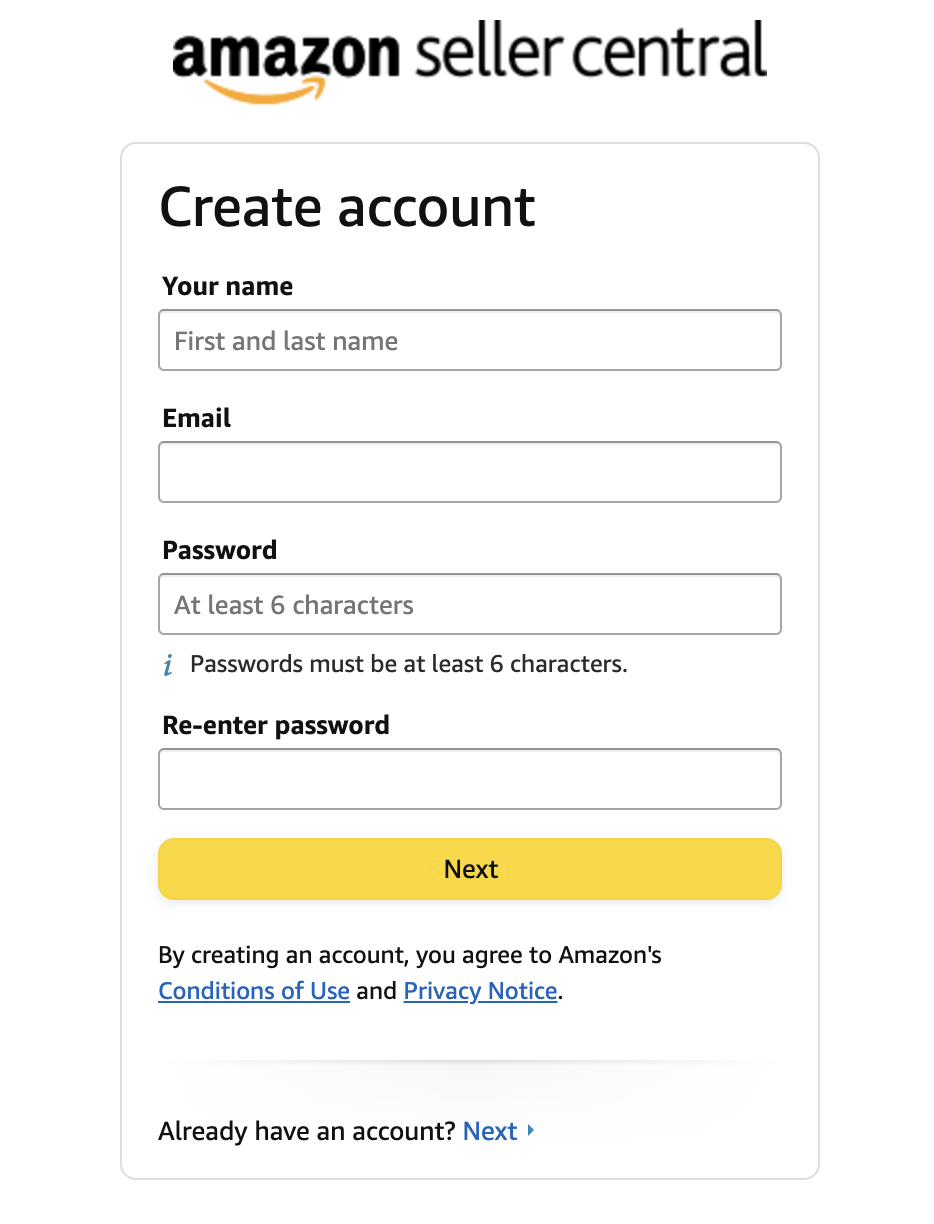
Go to Amazon Seller Central and click the Sign up button to start the registration process. If you already have an Amazon account, you can sign in right away. Otherwise, click Create your Amazon account and enter your email, password, and name to create one.
3. Enter your business information
To complete your account, you’ll need to provide the following information:
- Business name and location
- Business type:
- State owned
- Publicly listed
- Privately owned
- Charity
- Individually owned
In addition, you must supply:
- Bank account and routing numbers
- Internationally chargeable credit card
- Government-issued ID
- Tax information
- Phone number
4. Set up your seller profile
Enter your store name and indicate the types of products you plan to sell. Be aware that some categories may require Amazon’s approval before you can list products.
Amazon Seller Central Tips – Familiarize yourself with the Seller Central interface
After setting up an account, you can now access the Amazon Seller Central dashboard. It may feel overwhelming with so many features available, but once you acquaint yourself with the interface, it’ll become less intimidating.
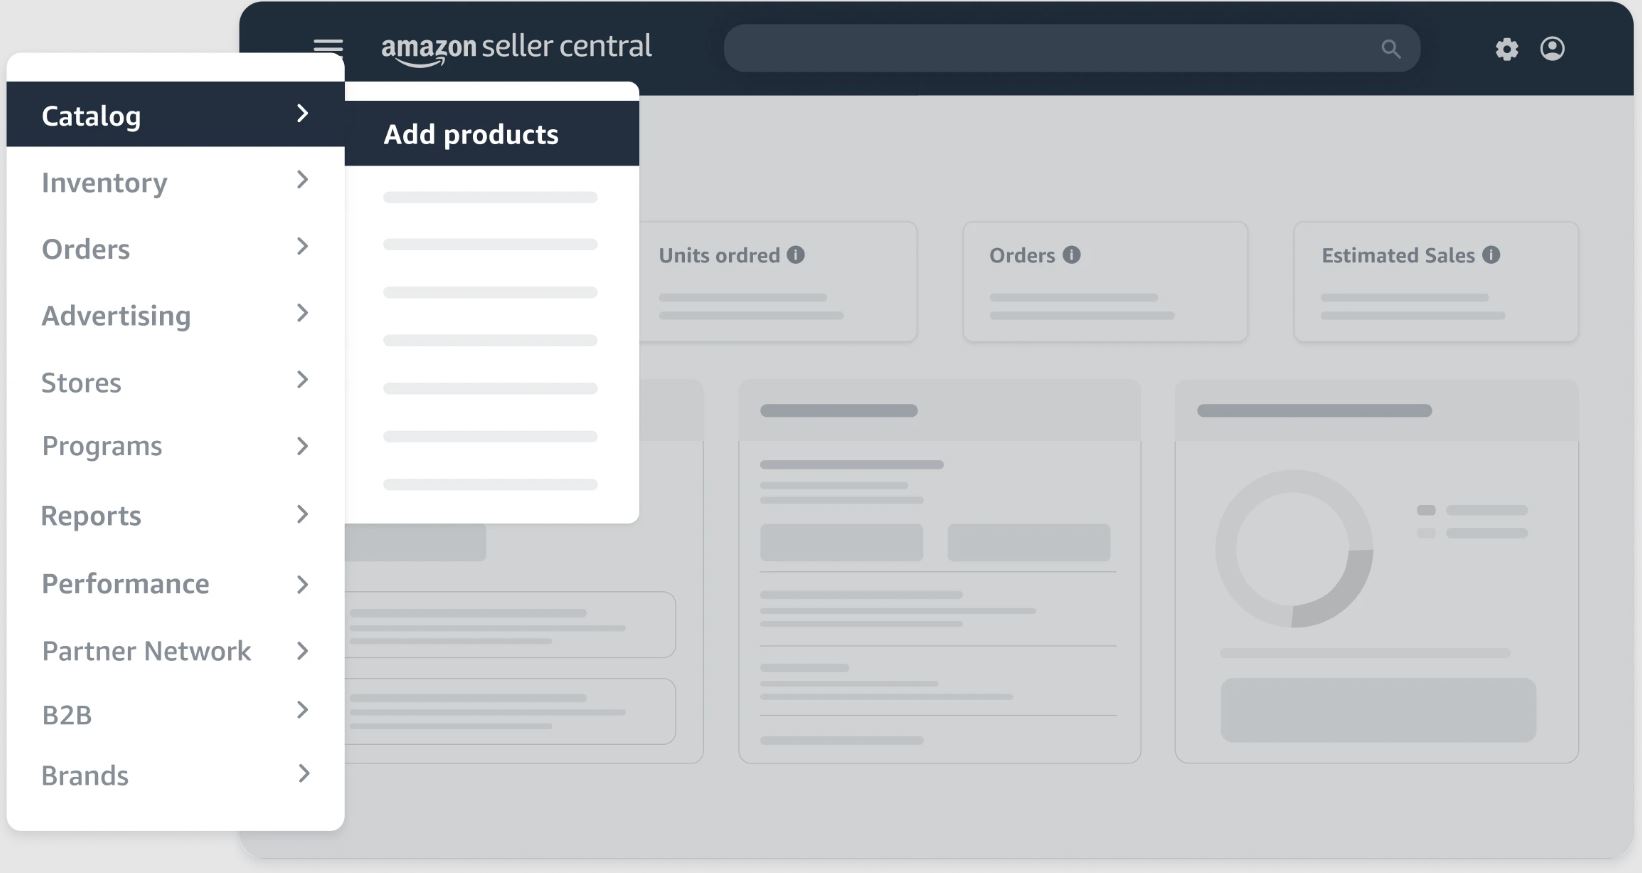
On the upper left side of the dashboard, you’ll find a hamburger menu that leads you to different sections of Seller Central.
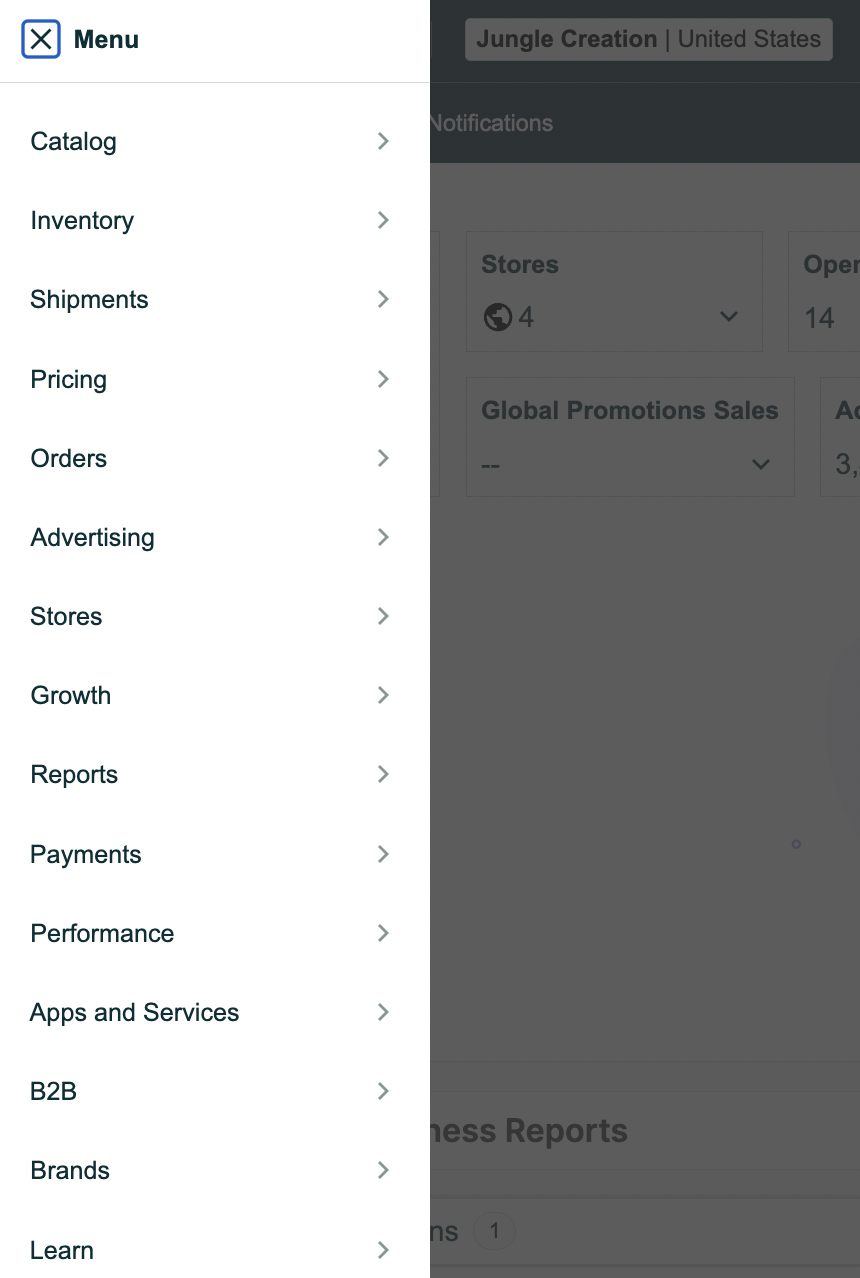
Here’s a quick rundown of what you can do in each section:
- Catalog: Where you can add new products to your Amazon store
- Inventory: Helps you oversee your stock levels and listings
- Shipments: Control your shipping and fulfillment settings, whether fulfilled through Amazon or in-house
- Pricing: Where you manage your product cost, including setting up rules to adjust prices automatically based on competition
- Orders: View, process, and track individual orders
- Advertising: Create and manage different ads, which can help analyze the performance of your ad campaigns to optimize your strategy
- Stores: Provides store insights and analyzes metrics related to your store’s performance
- Growth: Offers information and recommendations to increase sales, such as improving listings or adding keywords
- Reports: Where you can read various reports, track sales, traffic, and conversion metrics, and review financial data
- Payments: Access detailed reports on your payouts, refunds, and fees
- Performance: Helps you monitor account health, including product reviews, seller ratings, and more
- Apps and Services: Houses third-party apps to enhance your Amazon selling experience
- B2B: Where you manage settings for selling to business customers and access tools and reports specific to B2B transactions
- Brands: For registered brands, this section provides brand-specific tools and reports like customer behavior insights, popular search terms, and market trends
- Learn: Contains comprehensive guides to help you navigate ASC
Listing your products on Amazon Seller Central
This process is your gateway to reaching millions of potential customers. It’s pretty straightforward, and you can complete it in just a few steps.
But before digging into the nitty-gritty of crafting a product listing, consider the item you want to sell. If it’s under a name enrolled in Amazon’s Brand Registry, you must be a brand representative or an authorized reseller. On the other hand, some products may require approval from Amazon to be listed.
Once everything is settled, you can now produce a listing through the following steps.
1. Find your product
Under the Category section, click Add products. Enter the product’s Global Trade Item Number (GTIN) or product ID. If you can’t find your product on the search listings, click Create a new listing.
2. Fill in the product details
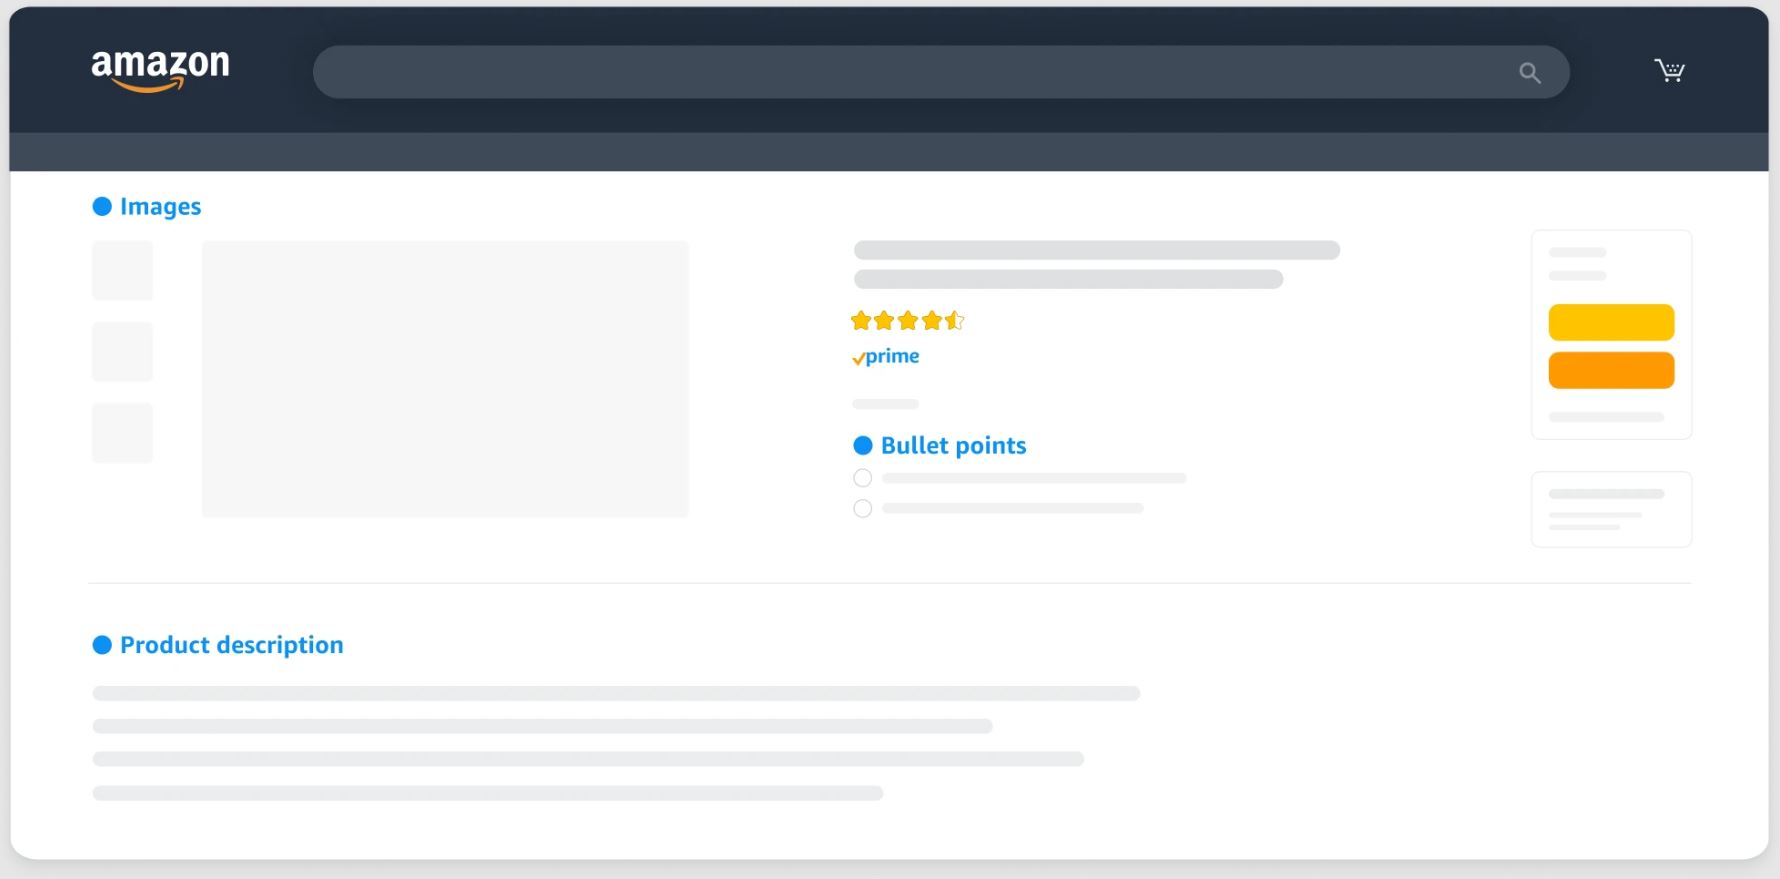
This is where you’ll enter all the information needed for your product listing. Be as thorough as possible to optimize your listing for search and conversions. Here are some important sections to complete:
- Item name: Ensure this is clear and descriptive, including the brand, product type, and key features.
- Product description: Write a compelling description to give customers more in-depth information so they know exactly what they’re buying.
- Bullet points: Use these to highlight key features and benefits, focusing on details like material, size, usage, and special characteristics.
- Images: Upload high-quality images of your product that show different angles, packaging, and usage.
- Keywords and search terms: Insert specific keywords that potential buyers might use.
3. Set your pricing and fulfillment details
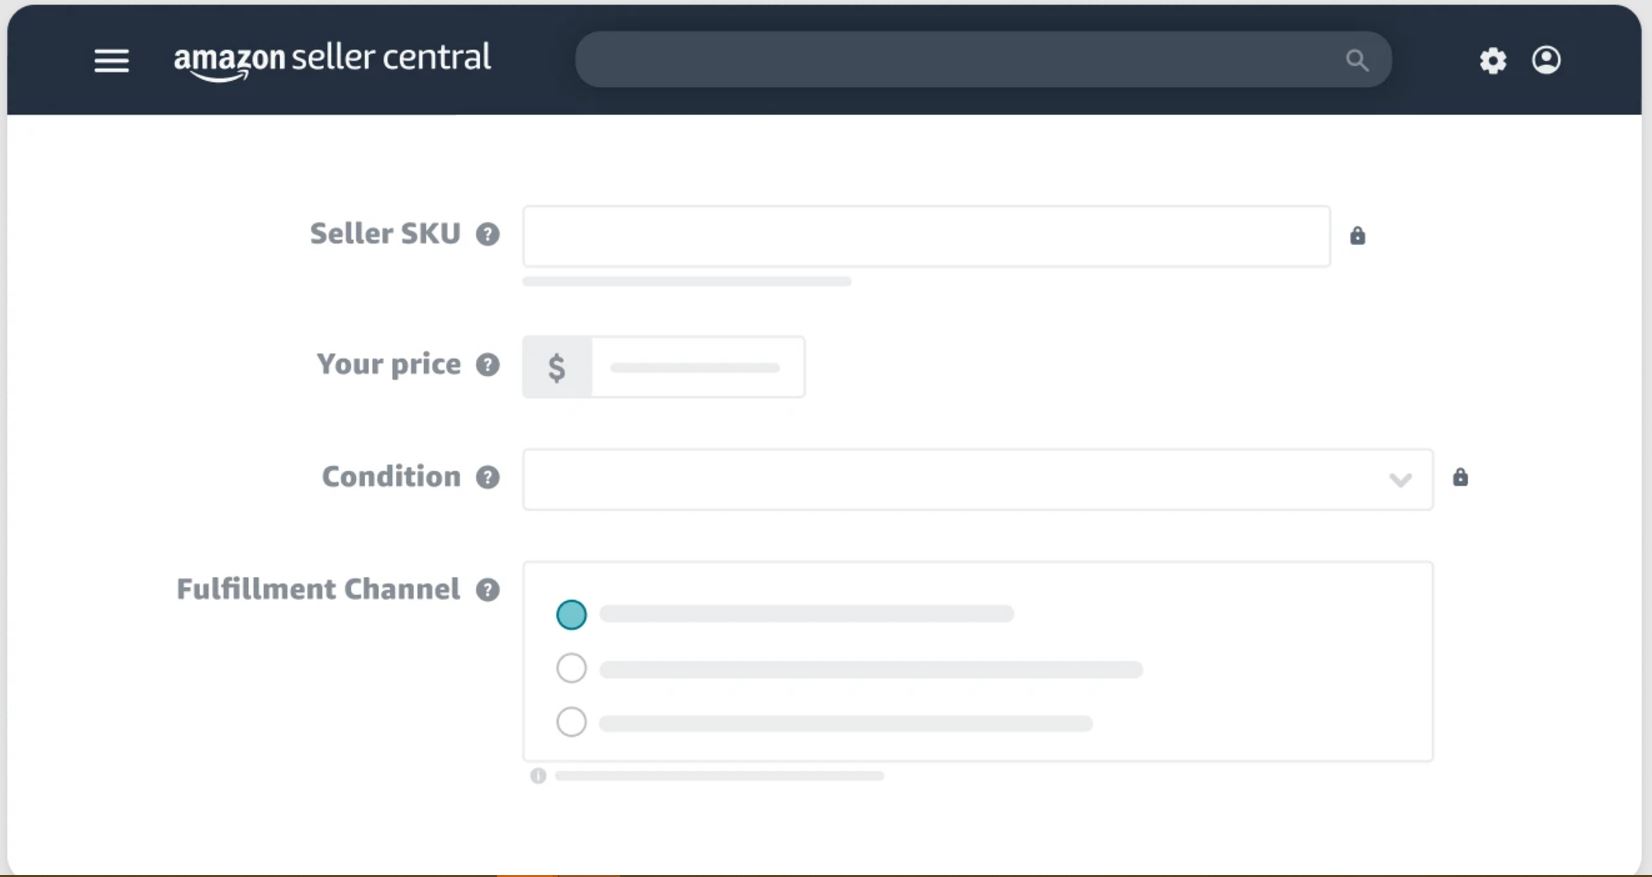
Enter your desired selling price for your product and its condition (new, used, refurbished, etc.). This section also asks you to select the Fulfillment Channel, that is, whether you’ll fulfill orders yourself (Fulfilled by Merchant) or by Amazon (Fulfillment by Amazon).
4. Review and publish your listing
Once all sections are filled in, review your listing before clicking Submit. If you want to publish it later, click Save as draft.
Expert Amazon Seller Central tips: Automate pricing
Automating your pricing on Amazon is a smart move. It helps you stay competitive by adjusting prices automatically based on market conditions so you don’t have to monitor and tweak prices constantly. That saves you time and boosts your chances of winning the Featured Offer.
Here are the steps to set up automated pricing on ASC:
- In the Pricing section, click Automate Pricing, then Create a pricing rule.
- You can start with a pre-configured price rule or create your own strategy based on feedback rating, fulfillment channel, or another option.
- Select the stock keeping units (SKUs) you want to add and the rules for each one.
- Automated pricing will take effect immediately. Monitor your price changes to align the impact on your sales.
Manage your inventory on Seller Central
Amazon Seller Central’s Inventory section is your central hub for overseeing all your product listings. There, you can manage your entire catalog, whether you sell a handful of items or hundreds. This is crucial for maintaining the health of your Amazon store, as it helps you avoid stockouts, reduce excess inventory, and optimize your listings for stronger sales performance.
On this page, you can:
- View all your listings and sort according to status, SKU, and product name
- Edit listings to change information
- Copy a listing and create a new detail page
- Delete a listing from your account
- Relist a product that’s inactive
- Add images and videos to your listings
- Monitor which products are active, inactive, or out of stock
Expert tip: Improve your Amazon Inventory Performance Index (IPI) score
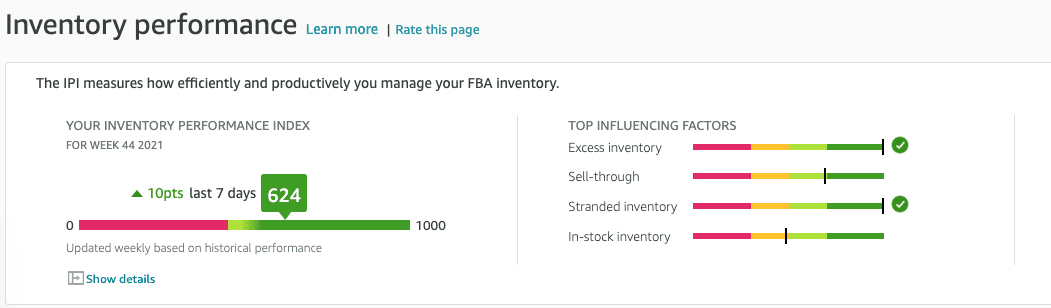
The Inventory Performance Index (IPI) score is Amazon’s way of measuring how well you manage your stock. If you use Fulfillment by Amazon (FBA), this score is very important because it can affect your storage limits and fees. The IPI score ranges from 0 to 1,000, with the higher, the better.
To improve your IPI score, be sure to:
- Increase your sell-through rate: Focus on boosting sales with better product listings, competitive pricing, and Amazon ads.
- Fix stranded inventory: Keep an eye on any listing issues that suppress your products’ availability and resolve them quickly.
- Keep popular items in stock: Use Amazon’s Restock Inventory tool to avoid stockouts, especially for your bestsellers.
Analyzing sales data on Seller Central
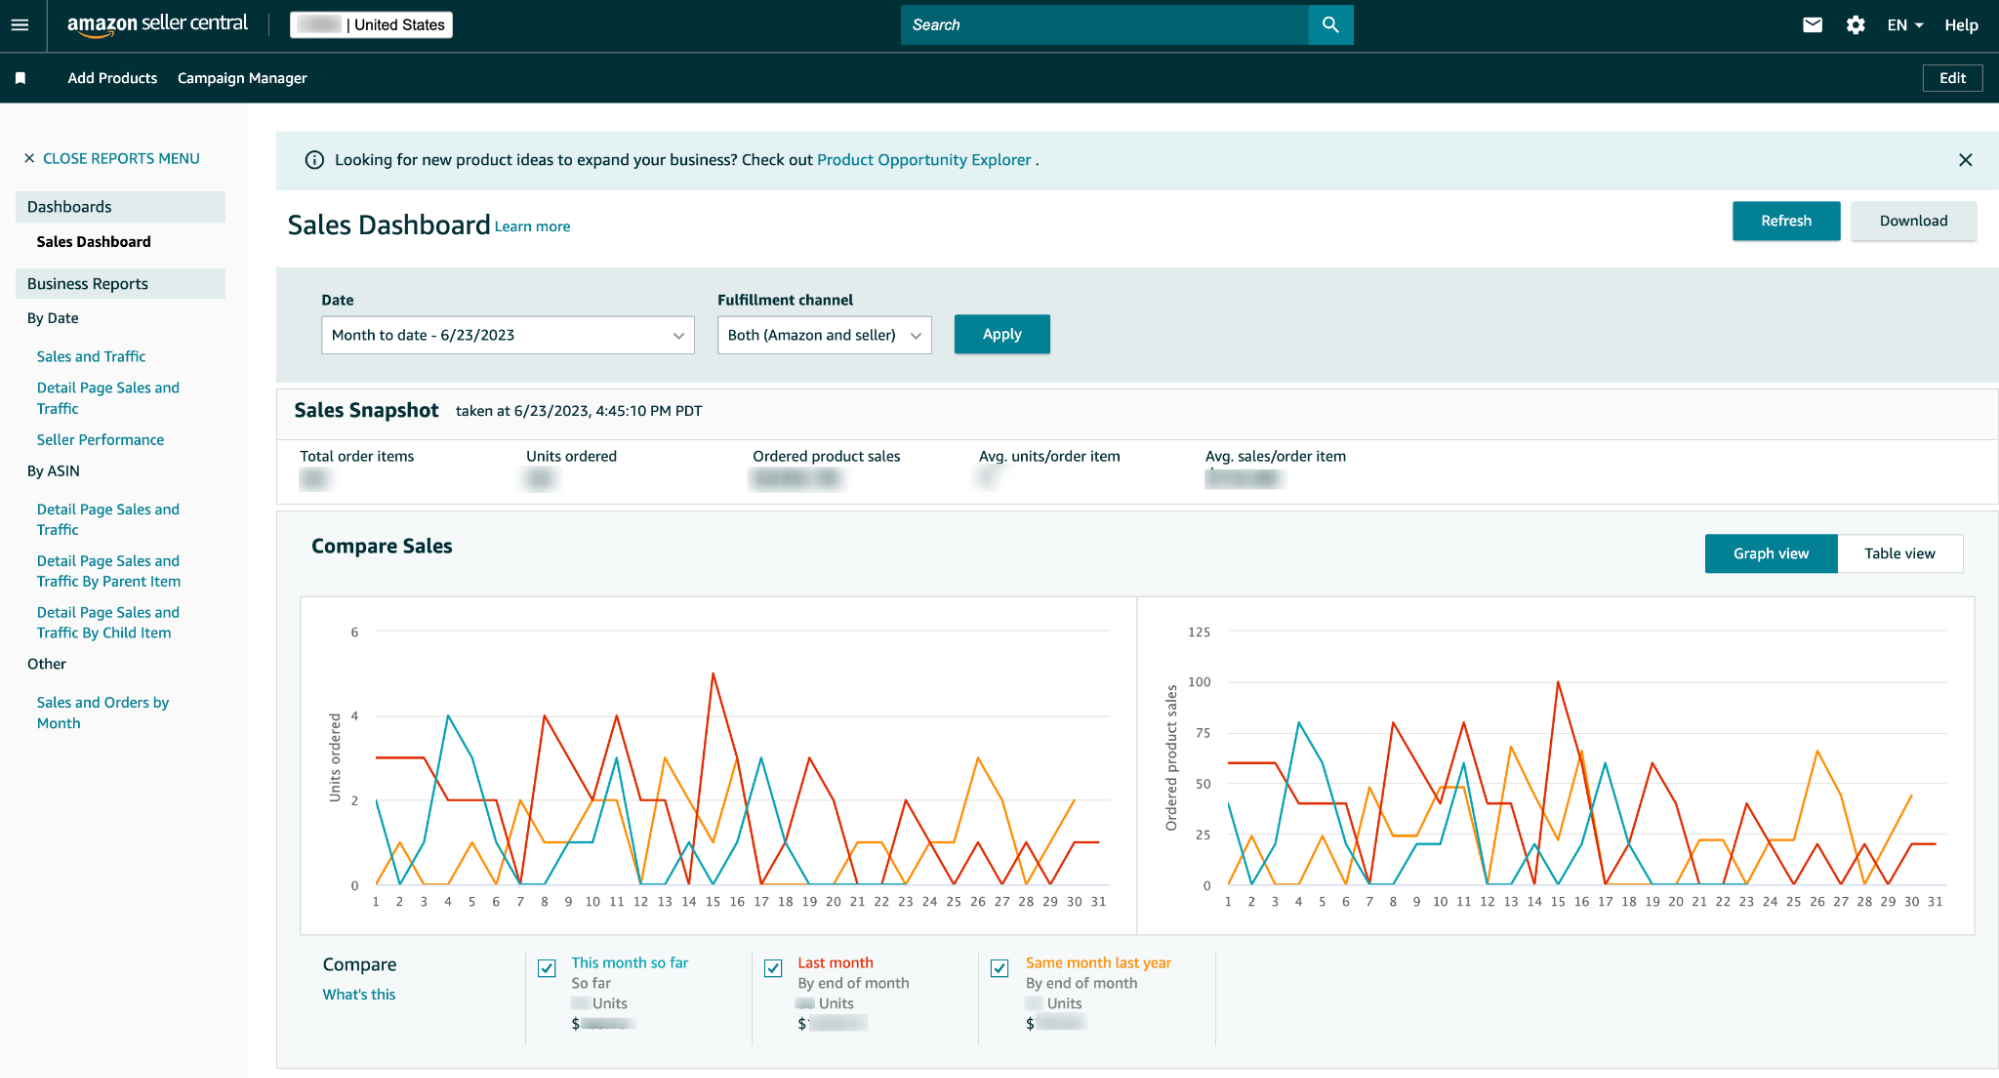
The Sales dashboard on Amazon Seller Central is a powerful tool that gives you a quick visual overview of your sales performance. It’s packed with data to help you track your revenue, identify trends, and make informed decisions to grow your business.
Here are the key metrics you should monitor:
- Total sales (revenue): The total dollar amount of sales generated within a specific time frame
- Units sold: The total number of product units sold
- Order count: The total number of orders placed, regardless of how many items were in each order
- Featured Offer percentage: The percentage of time your products win the Featured Offer, which is crucial for generating sales
- Sales growth rate: The percentage increase (or decrease) in sales compared to a previous period (month-over-month or year-over-year)
- Traffic (sessions): The number of visits your product listings receive
One of the main features of the Sales dashboard is the Sales Report, which allows you to track and analyze sales data within a specific range. To generate a Sales Report, follow these steps:
- On your Seller Central dashboard, click the hamburger menu on the upper left side, hover over Reports, and click Business Reports.
- Customize your views by selecting a specific date, category, or fulfillment method, then hit Apply.
- Toggle between Table view and Graph view for a better visualization of your report.
You can also see business reports arranged by date, ASIN, or other categories on the left sidebar for a detailed breakdown of your sales. To download business reports (in .csv format), simply click the Download button at the top of each report’s page.
Amazon Seller Central – Ensuring safety and compliance

The Compliance dashboard on Seller Central is a crucial tool for sellers who want to ensure their products meet Amazon’s guidelines and legal requirements. It centralizes all compliance-related information, making it easier to manage product compliance, track violations, and resolve issues quickly. Key features of the Compliance dashboard include:
- Monitoring product compliance status
- Managing product documents and certifications
- Staying informed about product recalls and safety notices
Amazon is strict about compliance, and even minor slipups can lead to costly penalties, suspended listings, or, worse, losing your selling privileges. So, be sure to provide clear and accurate product information, ensure timely shipping and delivery, and provide exemplary customer service. These simple steps help preserve a high seller rating.
Wrapping up — Maximize Amazon Seller Central Tips’ full potential to make your Amazon store a star
Amazon Seller Central is your single hub for managing every aspect of your Amazon business. From listing your products and managing inventory to analyzing sales data and ensuring compliance, it’s packed with powerful features designed to help you streamline operations and boost sales. The key is to explore every section, stay up to date on Amazon’s policies, and make the most of the automation and analytics tools available.